
Hướng dẫn lab lập trình cơ sở javascript phần 2
Phát hành: 2 tháng 12, 2025

Trong phần trước mình đã làm và giải thích các thuộc tính từ lab 1, 2, 3, 4, để nối tiếp phần trước thì đây là phần tiếp theo, phần này mình sẽ làm tiếp tục các lab còn lại tử lab 5, 6, 7, 8. Vậy là full lab của lập trình cơ sở với javasrcipt rồi.
Tất cả cách làm của mình để sát với slider mà các bạn học và có lab có lời giải sẵn mình chỉ copy ra và giải thích kỹ lại cho các bạn thôi nhé, còn lab nào không có lời giải trong bài là mình làm.
Lab 5
Bài 1
Xây dựng trang web cho phép đặt mua iPhone9 với số lượng nhập từ bàn phím có giao diện như sau.
label#prochứa tên sản phẩm ở phần nội dung và đơn giá ở thuộc tính data-price.
input#qty chứa số lượng sản phẩm nhập vào từ người dùng
span#name và span#amount được sử dụng để hiển thị tên sản phẩm và thành tiền (đơn giá x số lượng) khi nhấp nút [OK].
Viết mã javascript sao cho khi nhấp nút [OK] thì hiển thị tên hàng hóa vào span#namevà thành tiền vào span#amount.
Các bạn có thể custom giao diện theo ý muốn từ class đến id nhé
document.getEtlementById()bạn có thể hiểu đây là lấy phần tử theo id nhé, ở đây id là#pro.document.getEtlementByTagName()là lấy phần tử theo tên của thẻ.getAttribute()lấy giá trị attribute theo tên.
Bài 2
Xây dựng trang web ban-hang.html được mô tả như hình sau:
 image in blog website Ánh Văn Hóa
Mới chạy lên: Hiển thị danh mục hàng hóa, giỏ hàng rỗng, tổng số tiền là 0.
Nhấp [Thêm]: Thêm mặt hàng được chọn vào giỏ hàng, tính tổng tiền.
Nhấp [Xóa]: Xóa mặt hàng khỏi giỏ hàng, tính tổng tiền.
document.queryselector()lấy phần tử theo id, class, tagname, attribute, các bạn dùng theo kiểu selector trong css nhé và nó trả về 1 phần tử.document.queryselectorAll()nó cũng tương tương tự như cái trên chỉ khác nó lấy tất cả phẩn tử có cùng class, id, tagname trả về 1 mảng.cloneNode()sẽ copy lại phần tử đang trỏ đến.setAttribute()đúng như cái tên nó sẽ set attribute bào phần tử mà bạn đang trỏ đến.appendChild(),appendChildlà một phương thức của đối tượngNodetrong JavaScript, được sử dụng để chèn thêm một Node con vào cuối của Node hiện tại.removeChildlà một phương thức trong JavaScript để loại bỏ một nút con khỏi một nút cha. Khi được gọi, phương thức này sẽ xóa nút con cần loại bỏ khỏi nút cha mà nó được gọi từ đó.substr()phương pháp trích xuất một phần của một chuỗi.
Lab 6
Bài 1
Tạo trang web có giao diện và xử lý như sau:
 image in blog website Ánh Văn Hóa
addEventListenner()lắng nghe sự kiện của 1 phần tử. classList là một thuộc tính của đối tượng Element trong JavaScript, nó được sử dụng để truy cập và thao tác các class của một phần tử. Bằng cách sử dụng các phương thức trong classList, chúng ta có thể thêm, xóa, hoặc kiểm tra sự tồn tại của một class trên một phần tử, thêmadd(), xóaremove(),toggle()là một phương thức trong JavaScript cho phép thêm hoặc xoá một lớp (class) trong một phần tử HTML. Khi được gọi, phương thức này sẽ kiểm tra xem lớp có tồn tại trong phần tử đang xét hay không. Nếu lớp này đã tồn tại, phương thức sẽ xoá lớp đó. Nếu lớp này chưa tồn tại, phương thức sẽ thêm lớp đó vào phần tử đang xét.
Bài 2
Tạo trang web cho phép 2 người chơi trò tictactoe có giao diện như sau:
 image in blog website Ánh Văn Hóa
Hiển thị 9 nút trống.
Người chơi nhấp vào nút trống .
Lượt lẻ: tạo nhãn X và nền xanh (aqua).
Lượt chẵn: tạo nhãn O nền vàng.
Vô hiệu hóa nút được click để không click được nữa .
Nếu tổng click 8 lần thì báo kết thúc và load lại trang web .
Dưới đây là html, css và js cho bài trên như sau:
confirmhiển thị một hộp thoại có thông báo, nút OK và nút Hủy, phương thức trả về true nếu người dùng nhấp vào "OK", nếu không thì false.location.reloadlà một phương thức JavaScript được sử dụng để tải lại lại trang web hiện tại đang hiển thị. Khi được sử dụng, trang web sẽ được tải lại và hiển thị lại từ đầu.style.backgroundColorthêm phần css bằng js.
Bài 3
Thực hiện lại bài ví dụ demo image rollover và slideshow hình ảnh trong slide bài giảng:
Đối với slideshow: Tối thiểu 5 hình ảnh trong slideshow.
Dùng javascript xử lý đầy đủ các control sau: first, last, prev, next.
Imageđây là một đối tưởng tạo hình ảnh trong javascript, để tạo một đối tượng hình ảnh mới. Bạn có thể sử dụng nó để tạo một hình ảnh mới trong trang web của mình, hoặc để thực hiện các thao tác khác với hình ảnh như chỉnh sửa, hiển thị và tải xuống.
Bài 4
Xây dựng trang web được mô tả như hình sau:
 image in blog website Ánh Văn Hóa
Khi trang web vừa load , nhấp vào ô màu đỏ càng nhanh càng tốt khi nó xuất hiện.
Ô màu đỏ đặt ngẫu nhiên trong div (vùng box đen).
Xử lý sự kiện: theo dõi thời gian bắt đầu và nhấp chuột để tính toán thời lượng (duration) của sự kiện click.
document.createElementlà một phương thức trong JavaScript, được sử dụng để tạo một phần tử mới trong HTML.
Lab 7
Bài 1
Thực hiện lại bài ví dụ demo drag & drop element trong slide bài giảng:
 image in blog website Ánh Văn Hóa
setIntervalsử dụng để thực hiện một hành động lặp lại theo khoảng thời gian được chỉ định. Nó cho phép bạn chạy một hàm nào đó trong một khoảng thời gian cố định và được sử dụng rộng rãi để thực hiện các tác vụ như tải lại trang tự động, hiện thị thông báo hoặc cập nhật các dữ liệu trong ứng dụng web.clearIntervalđược sử dụng để xóa hoặc hủy một bộ đếm (counter) được khởi tạo bởi hàmseInterval.
Bài 2
Thực hiện bài ví dụ như hình minh hoạ và hướng dẫn:
 image in blog website Ánh Văn Hóa
Bài 3
Thực hiện lại bài ví dụ form submission và thêm nội dung nâng cao như sau:
 image in blog website Ánh Văn Hóa
Trang nhận dữ liệu
Trước tiên các bạn cần tạo 2 file html như trên mình đã tạo, khi các bạn tạo form thì hãy action tại file anotherpage.html để bên file html có thể nhận được nhé. window.location được sử dụng trong JavaScript để truy cập URL hiện tại của trang web hoặc để điều hướng đến một URL mới. Nó cung cấp các thuộc tính và phương thức để truy cập thông tin về URL, bao gồm domain, path, hash và query parameters. new
URLSearchParamslà một constructor của JavaScript dùng để tạo ra một đối tượngURLSearchParamsđại diện cho query parameters được truyền qua URL. Với đối tượng này, ta có thể thêm hoặc xóa các query parameter và tạo chuỗi truy vấn mới để gửi HTTP request. Mình có làm 2 cái cho các bạn tham khảo.
Bài 4
 image in blog website Ánh Văn Hóa
forEachlà một phương thức có sẵn trong JavaScript cho phép lặp lại các phần tử của một mảng và thực hiện một hàm cho mỗi phần tử đó. Còn lại mấy cái khác mình có giải thích lên bên trên.
Bài 5
Viết mã kiểm lỗi cho form đặt hàng có giao diện như sau:
 image in blog website Ánh Văn Hóa
Người dùng điền thông tin vào form và nhấp nút [Đặt mua].
Nếu chọn nơi nhận hàng là Ngoại thành thì hiển thị Phí vận chuyển.
Yêu cầu kiểm lỗi khi nhấp nút đặt mua.
Sản phẩm và đơn giá không được để trống.
Đơn giá phải là số dương.
isNaN()là một hàm được sử dụng để kiểm tra xem giá trị có phải là NaN (không phải số) hay không. Hàm này trả về giá trị Boolean, trả về true nếu giá trị là NaN và false nếu giá trị không phải là NaN. Phương thứcparseFloat()được sử dụng để chuyển đổi một chuỗi thành số thực (hoặc số thập phân).
Lab 8
Bài 1
Thực hiện lại bài ví dụ demo upload file trong slide bài giảng: Upload 1 file, upload nhiều file.
Dưới đây là file html, css và js của bài này, trước hết là upload 1 file
Code cho upload nhiều file.
this.fileslà một trong những thuộc tính của đối tượng trong JavaScript, nó chứa danh sách các tệp đang được xử lý bởi trình duyệt của người dùng. Bạn có thể sử dụng nó để lấy danh sách các tệp mà người dùng đã chọn để tải lên trong một trang web.
Bài 2
Thực hiện bài ví dụ demo geolocation trong slide bài giảng:
 image in blog website Ánh Văn Hóa
navigator.geolocation.getCurrentPositionlà một hàm JavaScript trong API Geolocation của trình duyệt, cho phép trang web yêu cầu truy vấn vị trí địa lý của người dùng thông qua trình duyệt. Khi hàm này được gọi, trình duyệt sẽ yêu cầu sự cho phép của người dùng trước khi truy cập thông tin vị trí của họ. Nếu sự cho phép được cấp, trình duyệt sẽ trả về một đối tượng vị trí địa lý bao gồm tọa độ kinh độ và vĩ độ của người dùng.
Bài 3
Thực hiện lại bài ví dụ demo audio/video DOM như trong slide bài giảng.
 image in blog website Ánh Văn Hóa
Về html mình sẽ không nói nhiều,
video.pausedlà một thuộc tính trong HTML và JavaScript để kiểm tra trạng thái phát video có đang bị tạm dừng hay không. Khi thuộc tính này được đặt làtrue, video đang bị tạm dừng, và khi được đặt làfalse, video đang được phát tiếp tục.play()là một phương thức JavaScript được sử dụng để chạy video trên trang web của bạn.pause()là một phương thức JavaScript được sử dụng để tạm dừng video. Khi được gọi, phương thức này sẽ dừng phát video hiện tại và giữ lại trạng thái hiện tại của video để có thể tiếp tục phát lại từ vị trí đó sau này. Thuộc tính volume của đối tượng video để điều chỉnh âm lượng.
Bài 4
Countdown clock.
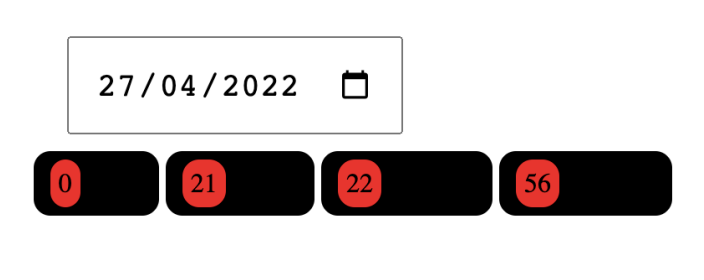 image in blog website Ánh Văn Hóa
localStoragelà một đối tượng trong JavaScript được sử dụng để lưu trữ dữ liệu trên trình duyệt web. Nó cho phép lưu trữ các giá trị dưới dạng cặp key-value (khóa-giá trị), và dữ liệu được lưu trữ trên máy tính của người dùng thay vì trên máy chủ. VớilocalStorage, bạn có thể lưu trữ các thông tin quan trọng như thông tin người dùng, cài đặt và cấu hình ứng dụng, v.v. Phương thứcgetItem()để set key và value cholocalStorage.
Phần kết
Đây là phần cuối của lab cho lập trình cơ sở với javascript WEB1043, nếu bạn chưa xem phần 1 thì bạn có thể truy cập tại đây
Tất cả phần trên mình chỉ giải thích các hoạt động của phương thức và thuộc tính cong logic bạn hãy xem và tham khảo. Bài assignment sẽ có trong tương lai sắp tới.
Chúc các bạn thành công !
Cảm ơn bạn ghé thăm